Raspberry Pi Christmas Light Controller
09 November, 2021
My former housemate asked me to build her a copy of the Christmas light controller that has been making the Christmas Tree lights dance to music for the past few years, because she was crushingly disappointed to realise that she couldn’t enjoy mine this year. Serves her right for buying a house and ditching me.
This project is based on Osprey22’s Raspberry Pi Christmas Tree Light Show article from instructables.com. Osprey’s article is written based on their north american experience, so requires alteration for the Australian environment.
Essentially, we’re hooking a tiny little computer up to a electronic light switch and making it power on strings of lights in time to the music.
Shopping List
- Raspberry Pi
- SD Card
- Raspberry Pi mounting kit
- SainSmart 8 Channel 5V SSR Module Board
- 5V 3amp enclosed power supply - Jaycar MP3295
- Jumper wires
- 3m twin core + earth 2.5mm power cable
- 3x large junction boxes
- 3x 8-Way 100A Machined Brass Busbar - Jaycar SZ2003
- 7x plug bases
- IEC320 Male Chassis Power Plug - Jaycar PP4005
- Cable clips and screws
- HDMI cable
- Double-ended USB-A male cable
- Double-ended male 3.5mm audio cable
- Keystone Wall Plate
- HDMI insert
- USB-A insert
- 3.5mm audio jack insert
- Box to contain the above
The box I created was 400mm high, 450mm wide and 140mm deep. The sides are made of pine boards and the faces are plywood. These dimensions are sufficient to contain the Raspberry Pi with HDMI cable inserted and the faceplate.
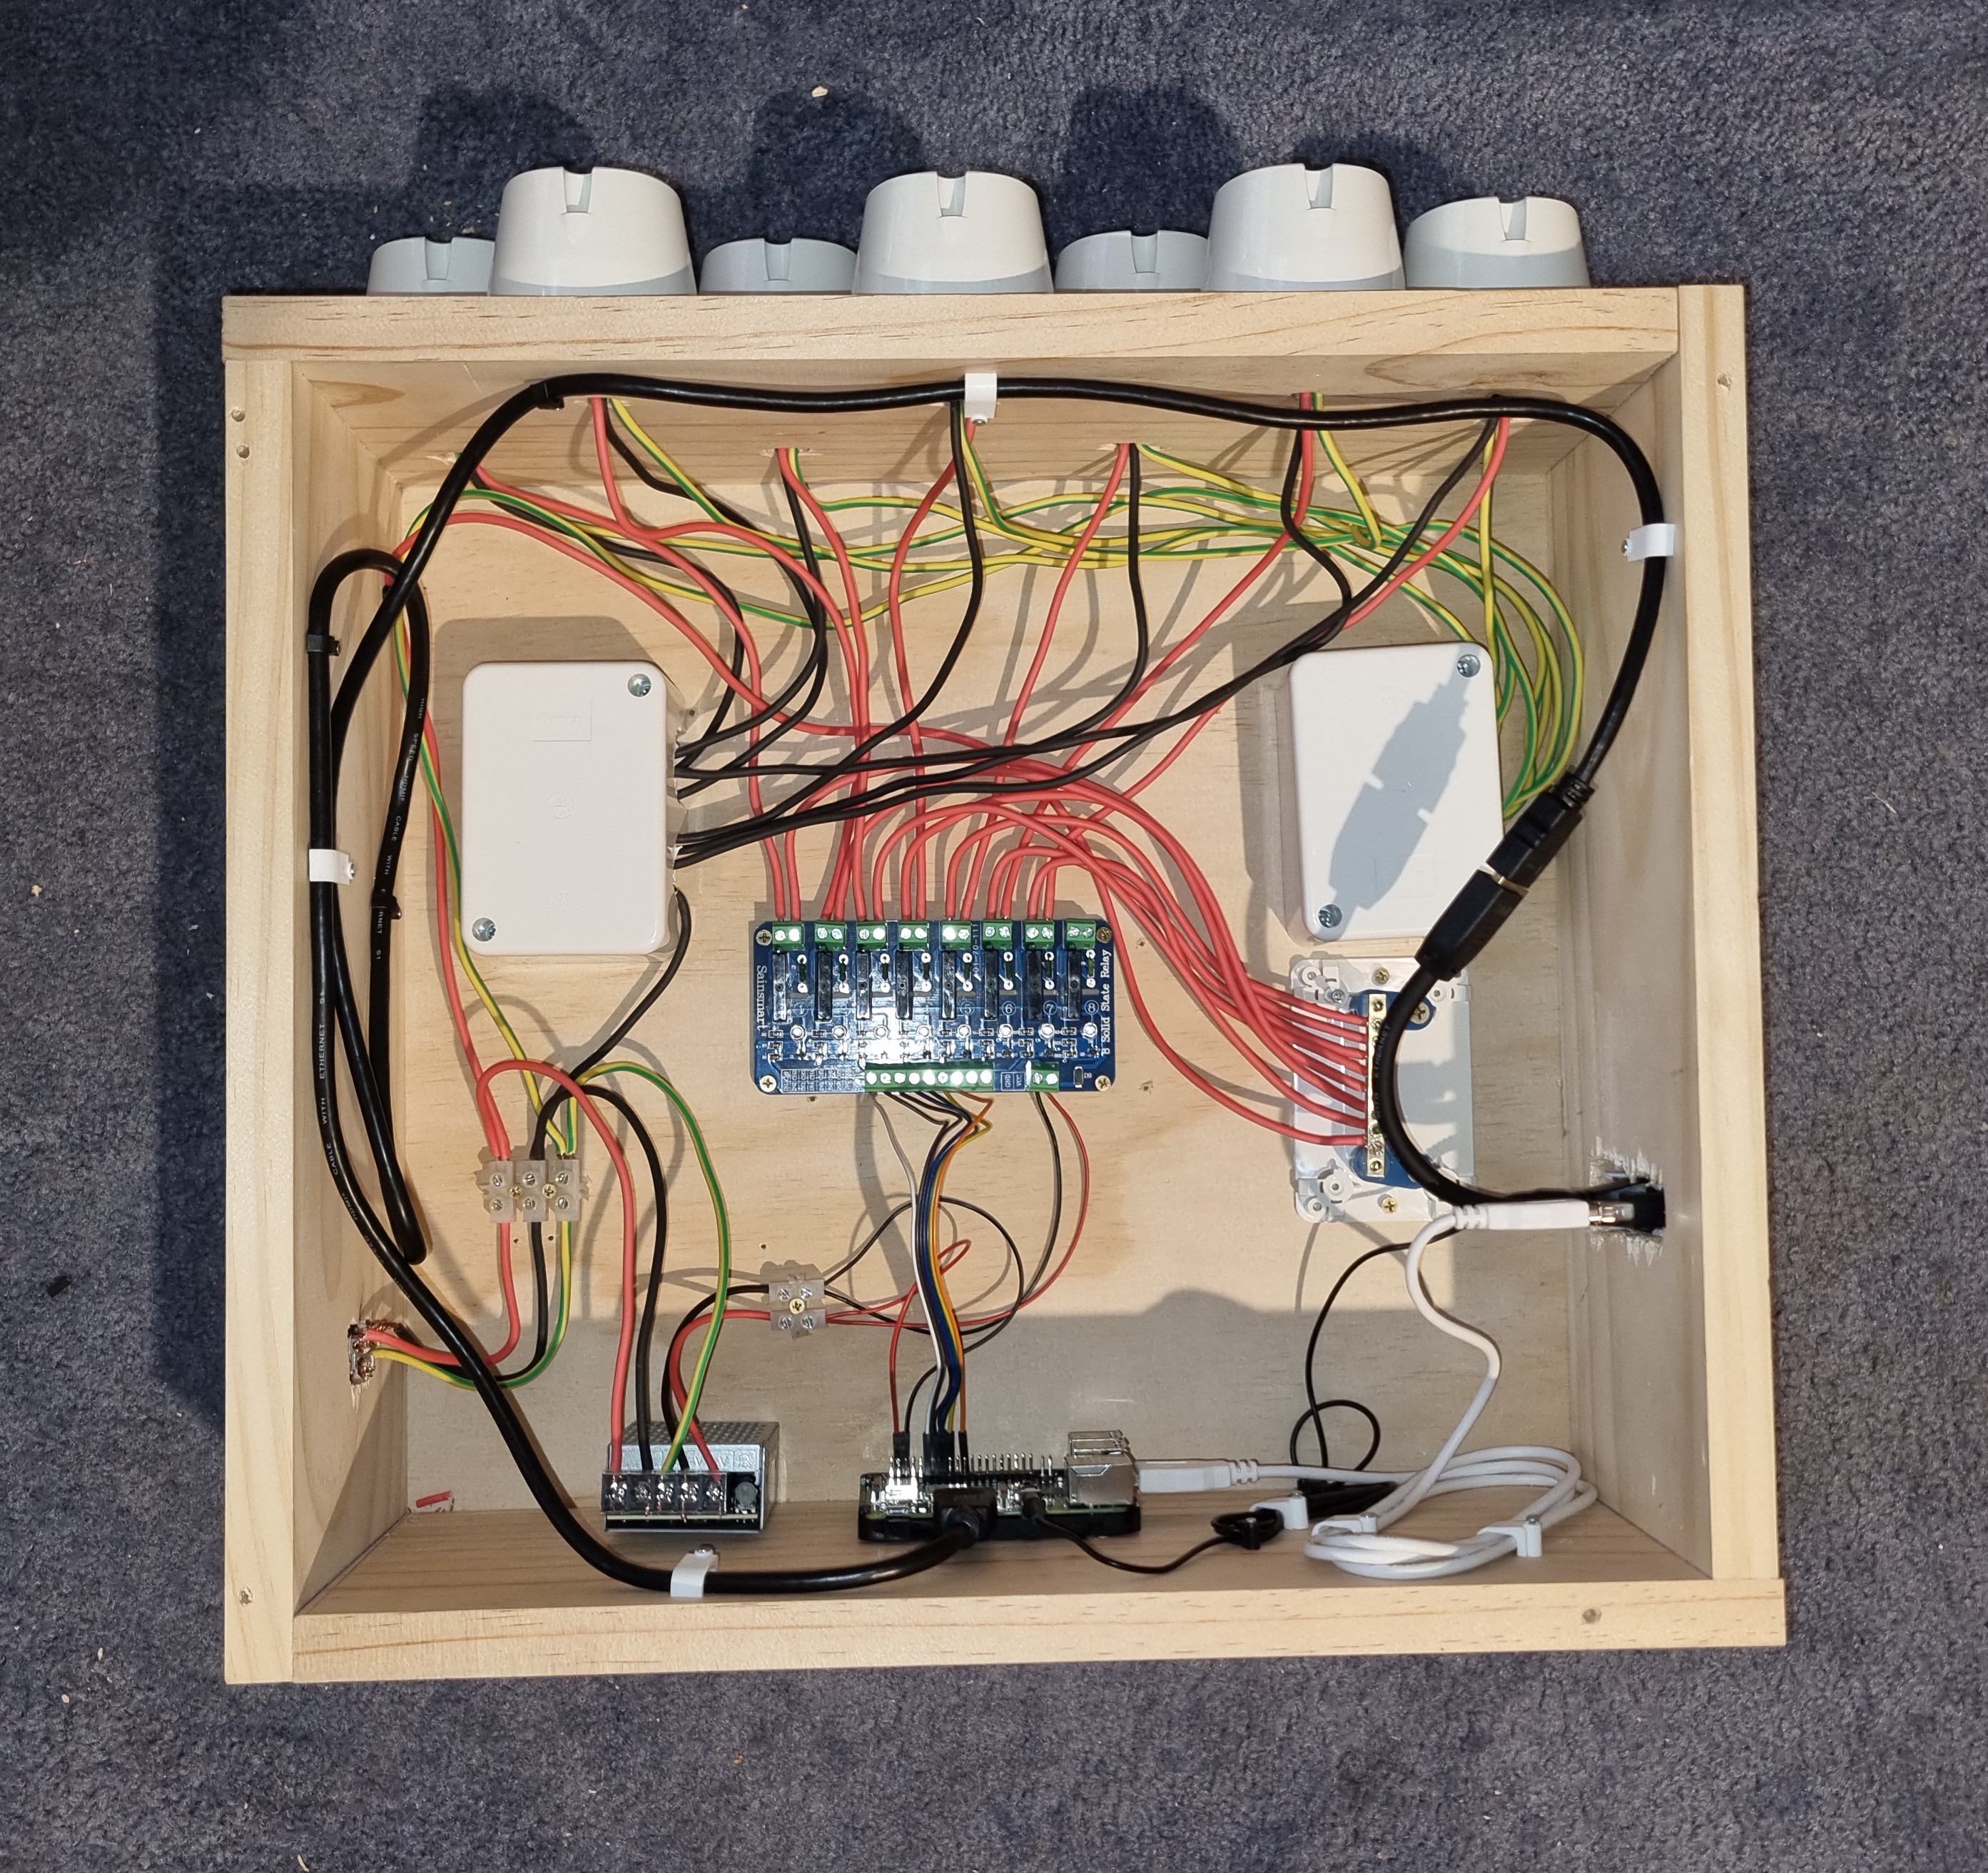
The image above shows how I laid the cabling. I won’t explain how this is done though because if you don’t know how to do it, you have no business playing with mains power. Get a friendly electrician to do this part if required - safety first!
The Raspberry Pi is powered through GIPO pins 4 and 6 from the 5V 3amp power supply, which also supplies the SSR Module. In order to power the SSR module, the power output needs to be set to maximum. Stresses me out every time.
At this point, the Raspberry Pi is ready to go, so we fire it up, install Raspbian, and go through the installation process.
Depending on how old the pi is, you may need to jump into sudo raspi-config select advanced options -> GL driver -> legacy
Osprey goes a bit gung ho at this point, and starts off on a path that leads to hand-coding lighting control files my the milisecond - more power to them. I on the other hand, grab the stable version of lightshowpi from bitbucket and run the installer script:
# Install git (if you don't already have it)
sudo apt-get install git-core

# Clone the repository to /home/pi/lightshowpi
cd ~
git clone https://togiles@bitbucket.org/togiles/lightshowpi.git

# Grab the stable branch
cd lightshowpi
git fetch && git checkout stable

# Run the install script
sudo ./install.sh
The install script takes a while to run so this is a good point to take a break.
Once the install is complete and all the dependencies are up to date, we can really get started.
First thing’s first: checking that the Pi is running the correct lights. This command runs through the different light channels, flashing each light in sequence.
sudo python py/hardware_controller.py --state=flash
The default configuration expects an 8 channel setup, but since I only use seven, this is the point where I jump into the /config directory and remove that extra channel. The software is kind enough to remap the frequency ranges to trigger the lights behind the scenes though.
Inevitably, I find that I’ve messed up the link to the SSR module at this point, and switch to just turning all the channels on instead of running through the cycle. Frustratingly, it takes a few seconds to happen after I hit enter though.
sudo python py/hardware_controller.py --state=on
Once the controller is running, it’s time to load up your music. By default, there’s a handful of 8-bit tracks included, but we have better musical taste than that!
I like to put my music into a /lightshowpi/music/christmas/ directory, just to keep everything nicely together.
sudo python py/synchronized_lights.py --file=/home/pi/lightshowpi/music/christmas/spirit-of-the-season.mp3
Automating the process
Ain’t no one want to be running songs one by one by one from the terminal, though. Luckily, this is a fully operational computer, and with one simple command, we can configure the system to run the commands itself.
crontab -e
I then set the following commands to run daily (or, at power on, in the case of starting the web controller) I run the show for myself for an hour each night, then leave a couple of lights running for the whole evening. Then I use the web controller to control things from my phone if there’s visitors to impress.
SYNCHRONIZED_LIGHTS_HOME=/home/pi/lightshowpi

# Start lightshowpi program on boot
#@reboot $SYNCHRONIZED_LIGHTS_HOME/bin/start_music_and_lights >> $SYNCHRONIZED_LIGHTS_HOME/logs/music_and_lights.play 2>&1 &

# Start lightshowpi webserver
@reboot $SYNCHRONIZED_LIGHTS_HOME/bin/start_microweb >> $SYNCHRONIZED_LIGHTS_HOME/logs/microweb.log 2>&1

# Start playing back songs and checking sms message at 6pm
00 18 * * * $SYNCHRONIZED_LIGHTS_HOME/bin/start_music_and_lights >> $SYNCHRONIZED_LIGHTS_HOME/logs/music_and_lights.play 2>&1 &

# Turn off the songs / sms at 7pm
00 19 * * * $SYNCHRONIZED_LIGHTS_HOME/bin/stop_music_and_lights >> $SYNCHRONIZED_LIGHTS_HOME/logs/music_and_lights.stop 2>&1 &

# Turn on the lights at 7:01pm
01 19 * * * python $SYNCHRONIZED_LIGHTS_HOME/py/hardware_controller.py --state=on --light 1,4 >> $SYNCHRONIZED_LIGHTS_HOME/logs/music_and_lights.stop 2>&1 &

# Turn off the lights at 1:00 am
00 01 * * * python $SYNCHRONIZED_LIGHTS_HOME/py/hardware_controller.py --state=off >> $SYNCHRONIZED_LIGHTS_HOME/logs/music_and_lights.stop 2>&1 &
Since this is Linux, you’ll have to set the files as executable. On Windows, every file is executable, but Rasbian takes things a little more seriously. You’ll want to do both the Lightshowpi and the web controller files, because doing this stuff in command line over SSH is tedious.
You will also want to give the Pi a static IP address so that you can connect to it once it’s running headless. After that, you can unplug the HDMI cable and get started on the important business of stringing your lights.
Share